Statuses
Proper Status assignment is crucial for the whole project management. Learn how to set statuses accross the whole project.
Statuses in general

tatuses represent various stages of a workflow process that can be assigned to their respective module.
Type of Statuses
You are able to define and manage custom statuses for Issues, Roadmaps and Test cases in Project settings of each project.
Issues
Issue statuses are used within the whole Issue management across all Issue types. You can see list of Issue type icons using particular status at the end of the line. Red dot marks the status is set as Initial or Final of respective Issue type. Yoiu can edit each Issue type statuses by clicking on particular icon. More about Issue types.

Test cases
Test cases use list of statuses similar to issues. These are linked only to Test cases. The order of the statuses set their workflow (the topmost status serves as Initial and the lowermost serves as Final). You are able to reorder these statuses using the

Roadmaps
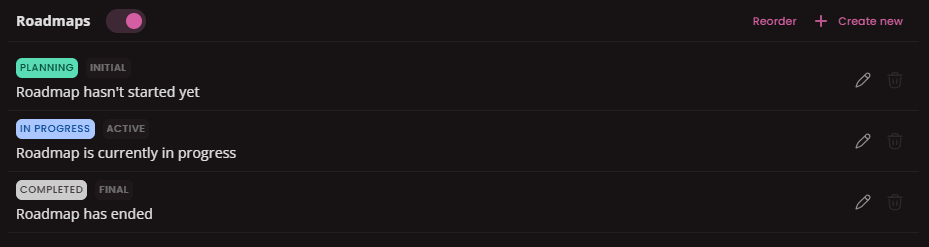
Usage of Roadmap statuses are separated in 3 individual categories (
Users can choose to use statuses or not. If statuses are not used, there are buttons to Start and End the roadmap. To use the roadmap statuses turn the switch ON.

At this point system creates a set of basic statuses for you. One per each usage (this is minimum you can have to work with roadmaps)
Create a status
To create a new Status got to

You'll see your currently created statuses.
Click on

- Type of entity: Select a type of entity you will use the status for.
- Name: Type a name of the status (that's how you'll see it).
- Description: A short description can be added for better understanding when and how to use the status.
- Color: Colors help to visualize severity & importance of the status. Set a separate color for chip background and for text itself. The preview of the status chip can be seen bellow the color palette.
After you set everything, click on
Edit status
To delete a status click on

Delete status
To delete a status click on

If you have currently anything assigned with the status you'll see a message where you need to select a new status to reassign these instances.

General settings
Set up Project's main instances such as Owner, Teams, Labels, Project stakeholders, Readme, Description or Kanban Templates.
Issue types
Categorize and Manage Project Issues. Create custom issue types to streamline tracking and resolution of bugs, tasks, change requests or improvements.